

Acting Tips:
How to Self-Tape Like a Pro
What’s up guys!
So I get this question a lot - how can I make my self-tape submissions stand out?
Aside from making sure your acting is on point - there are a few technical “behind the scenes” tips that can absolutely uplevel your self-tape submissions - so without further adieu…
Tip #1 - HIGH QUALITY PICTURE!
Do not send low res files to casting. Nobody wants to watch a pixelated version of you act.
Practically everyone has a smart phone now - and the majority of those phones have amazing cameras! I use my iPhone for self-tapes. Yup, even for clients! And it works!
It’s a great camera - and more than suitable for what a self-tape needs.

So… if you’ve got one - use it! If you don’t, you’re going to need to invest in a camera.
And there are LOADS of great cameras you can purchase with the price ranging from $50 to tens of thousands of dollars. You just need something that will get a clean shot of you, that ideally can easily transfer to your computer, so you can send off to your reps and casting effortlessly.
SIDE NOTE: I recommend putting your smartphone on a Tripod using an Iphone adapter.
Tip #2 - GREAT LIGHTING
You want to be seen. And you want to stand out! So investing in a great lighting kit that will not only make you look great, but also make your submission look pro - is worth it!
Think about it. We live in such a digital age - If a YouTube video doesn’t look like the person on camera put time into it - how much time are you really going to spend watching it? Probably not much - and if I’m being honest - you probably wouldn’t even click on it in the first place.
Now, I’m not saying casting isn’t going to watch your tape if it doesn’t look pro, BUT can you blame them if they start zoning out on your performance because you’re poorly lit?
Invest in lighting!
A ring light is great. Though it does give you rings in your eyes.
I personally use a Westcott Umbrella Lighting kit.

I’m IN LOVE with it! And so are my students! It literally gives everyone a nice, soft filter and makes us look beautiful.
Though they no longer make the one I have, here is a comparable even more affordable option: http://bit.ly/2yi4pWE
Tip #3 - GREAT SOUND

Great sound is SO IMPORTANT! You need to be heard.
I happen to have GREAT acoustics in my place, so I don’t personally need an additional microphone.
But if you notice the sound to be a bit dull on your camera, invest in a lavalier microphone. Amazon sells them for a little at $12.99! That’s nuts! Do a little bit of digging and see what works best for you.
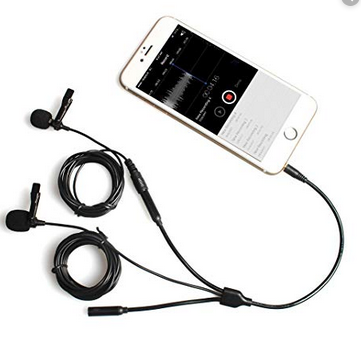
Note: I also recorded a few videos by plugging my earbuds (with the built in mic) into my phone and propping the mic area close to me (but OUT of frame) - and that also worked.
So, try out a few options. Find what’s best. But clean, clear sound is a must! And if there’s a lawn mower going outside - or some other loud, noisy distraction happening - wait to film until after it’s subsided.
As for your READER - make sure YOUR AUDIO is more present than theirs. A lot of times actors will have their reader stand right next to the camera - so the reader is louder than the actor. No no no. Don’t do this! Make sure your audio is crisper and a little louder than your readers (but make sure the reader can still be heard.)
Tip #4 - CLEAN BACKGROUND
If you have a blank wall at home that contracts with your skin tone/hair color, you’re probably in the clear.
Personally, I’m Caucasian, and all my walls are ivory. At one point I even had blonde hair. I was practically camouflaged on the first self-tape submissions I did.
I still got called in on some of them - but Oh my gosh - the callback ratio was nowhere near what it is now. What changed? (Outside of my hair color & set up) My background!
I have a large window in my dining room - and found some AMAZING blackout curtains that *actually block out light!* Link below.
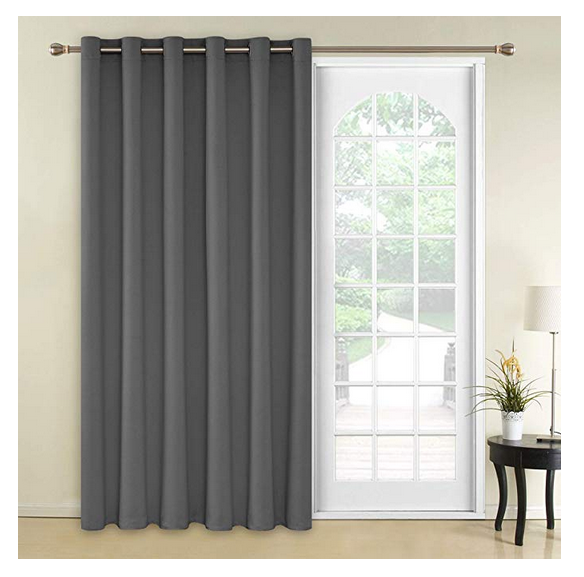
I swap my dining room curtains out for these bad boys when I have a self-tape submission to do, and we are off to the races!
https://amzn.to/2K6MmIu (I got them in Dark Grey & Greyish White)
Now that we’ve got all the behind the scenes - what about when you’re actually filming?
Tip #5 - LOOK GREAT - BUT ALSO LOOK THE PART!
Treat your self-tape audition like you’re going into casting. How would you dress for this character if you were going into the room?
Do that.
Side Note re: MAKE-UP: It’s not just for women! I’ve had several male students touch up blemishes and even out skin tone in our session because - dude, you’re on camera! You wanna look good! -Unless of course the character doesn’t.
In addition… there are a few liberties you can take with self-tape submissions when it comes to your look.
A character I recently booked through a self-tape went through a transformation halfway through the script where she looks completely different.
I personally took time and totally changed my look - even throwing on a wig. It worked. Thankfully. My husband thought I was nuts - but I felt so connected to this character that it just felt like the right- bold - choice to make.
Another one is props.
This is a delicate issue - that I’m going to give it’s own section to.
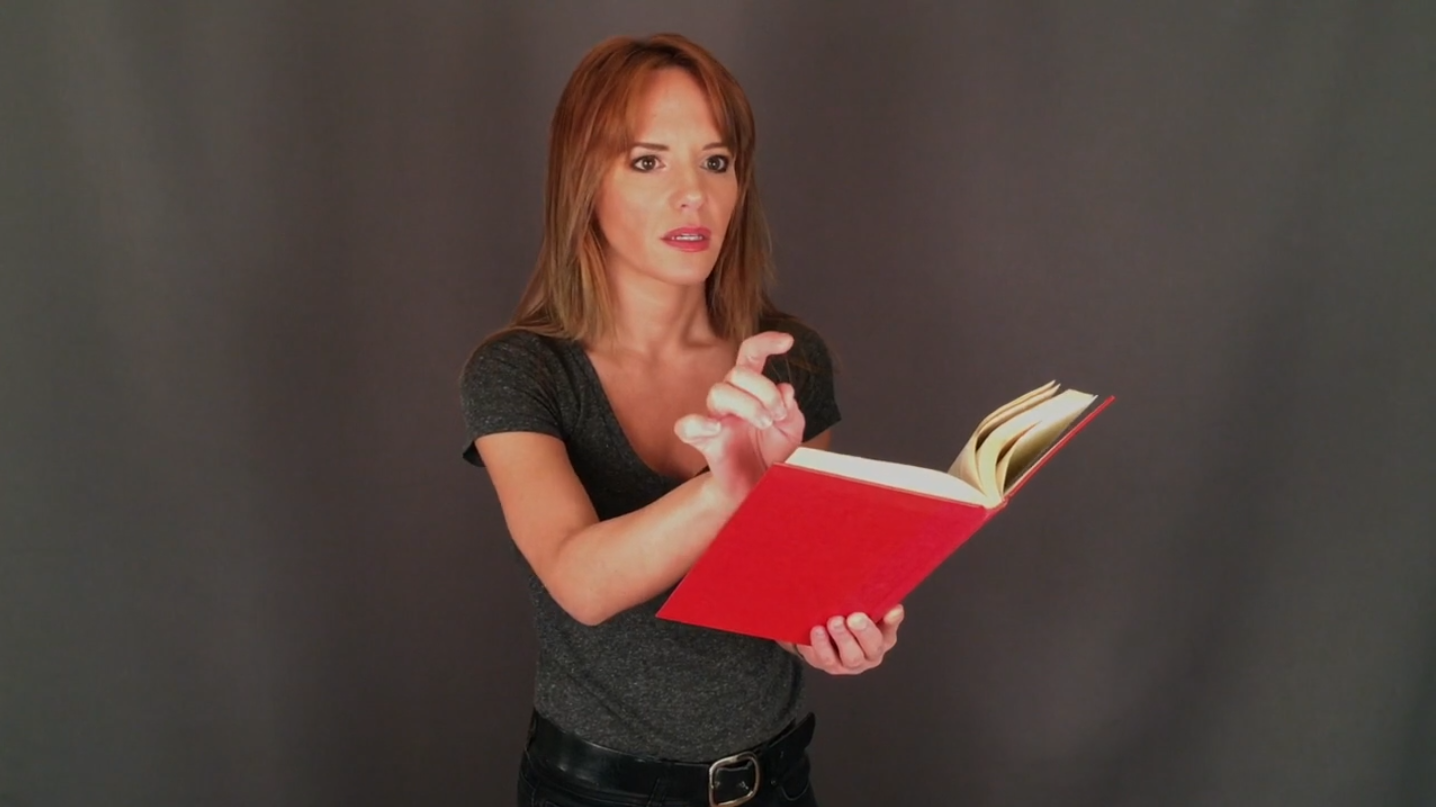
Tip #6 - PROPS, To Use or NOT To Use…
If you’re going in for an audition, outside of a phone - DO NOT BRING PROPS! And personally, I don’t even use my phone half the time because it’s a distraction for me.
However… Self Tapes offer us that great world of being able to create a little more of the scene than we would in the audition room because… we’re home, we’ve got a set up, and hell, why not bring a little realism to your scene if you can!? Right?
I was mixed on this until I produced a short film that required I cast actors off tape - and I personally saw the difference when an actor brought a little something extra to their submission vs. when they played it safe.
One of my actors, Kento Matsunami sent in a BRILLIANT self-tape. Outside of a charismatic personality, he knew his character was sitting in a café, and had one line. That was it. The majority of tapes I received, were - as you guessed it - actors sitting down, saying their line - and that was it. Which is all well and good. But Kento blew away the competition by offering several takes of the one line.
Take 1: Kento filmed himself sitting at a table, sipping on a coffee.
Take 2: Sitting at a table, sipping on Starbucks.
Take 3: Sipping on wine.
Take 4: I think he was playing with silverware or something.
It lent so much to the character and showed me how invested he was in making this role something special - we ended up writing a whole scene for him. He’s brilliant and I can’t wait to work with him again.
So, you have a little leeway with your self-tape submissions - use it!
Tip #7 - EYELINE!
Where the heck do you look!?
Standard practice: Just off to the Right or Left of the camera. And if there are multiple people that you are referring to in the scene, SPLIT THE CAMERA.
What do I mean? put one character on one side of the camera, and the 2nd character on the other.
CHARACTER 1:

CHARACTER 2 - Split the Camera
Tip #8 - FRAMING
Traditionally with Self-Tapes, you want a Tight Medium (just above the mid-point of your torso to the top of your head.)
This is a GREAT shot in general because it’s close enough to see everything you’re doing - but it also gives you room to play if want to use the space a bit and use your environment.
Tight Medium Shot:

Now, if it’s a drama and you’re not doing a whole lot of moving (which you shouldn’t do in general - but that’s a WHOLE other topic) - A tight Head & Shoulders Shot is great! It feels intimate. And since casting is typically watching these tapes either on their phones or in smallish frames - this allows YOU to fill the screen even more. And honestly, you can get even closer than I did here:
Head & Shoulders Shot:

Every now and then, casting will ask for a very specific shot. Like the one below, they requested a top of head to just below the belt line.
Don’t question it - just give them what they want.
Finally, more and more often I’m noticing a request to have a “Full Body” slate - meaning Head to Toe.
Again, give them what they want. Sometimes, I’ll turn my phone vertically *JUST FOR THE HEAD TO TOE SLATE - then I’ll edit it to flow right into a horizontal framed up shot.
Tip #9 - MEMORIZATION
If you can be, be memorized. But it’s ALWAYS more important to be fully in your character than to be word perfect. So if you need your script - USE IT! But if you can be off book - be off book.
Tip #10 - EDITING
The other day, I heard a few actors mention they don’t edit their self tapes. I guess in some cases that can work. Personally, I’ve never sent in an unedited self-tape.
With apps like iMovie & FilmoraGo so easily accessible, I always recommend taking the few extra moments and giving your submission that extra little something to stand out. Plus, in editing, if you want to bump up the light or tweak the framing a bit, you can. Aside from that:
I always put my name & character at the front of the submission, whether I’m slating or going straight into the read.
For multiple scenes, depending on the tone of the show, I’ll either do a cross fade or a jump cut to the next scene - and an info card/credit at the end:

Now that you know the top tips to make your tapes stand out, share this with a friend so you’ll always have a professional set up wherever you go!